
#No-code CSV integration
Setu BBPS BillCollect allows billers to get on-boarded on BBPS without implementing any APIs on their end. You can upload your customers’ bills via a predefined CSV format.
If you wish to integrate with APIs instead of CSV, please follow this guide for BBPS BillCollect API integration.
See a comparision between CSV upload and API integration here.
#How to integrate
Start by signing up on The Bridge ↗, if you haven’t already. This is Setu’s single portal for managing all your integrations with us.
If you have an existing biller configuration, skip to Step 3.
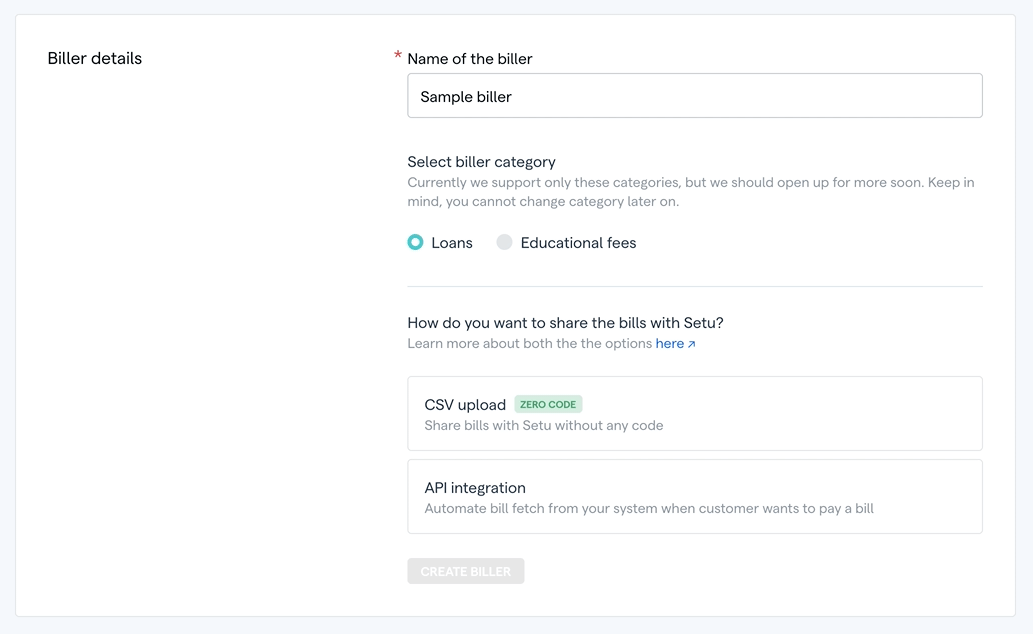
#Step 1 — Create a biller on The Bridge
Head to the Available products page via the sidebar and click on one of the Collect BBPS cards under the Payments tab. Click on Create a Biller button. Make sure you select the CSV upload option while creating your biller.
#Step 2 — Add configuration on The Bridge
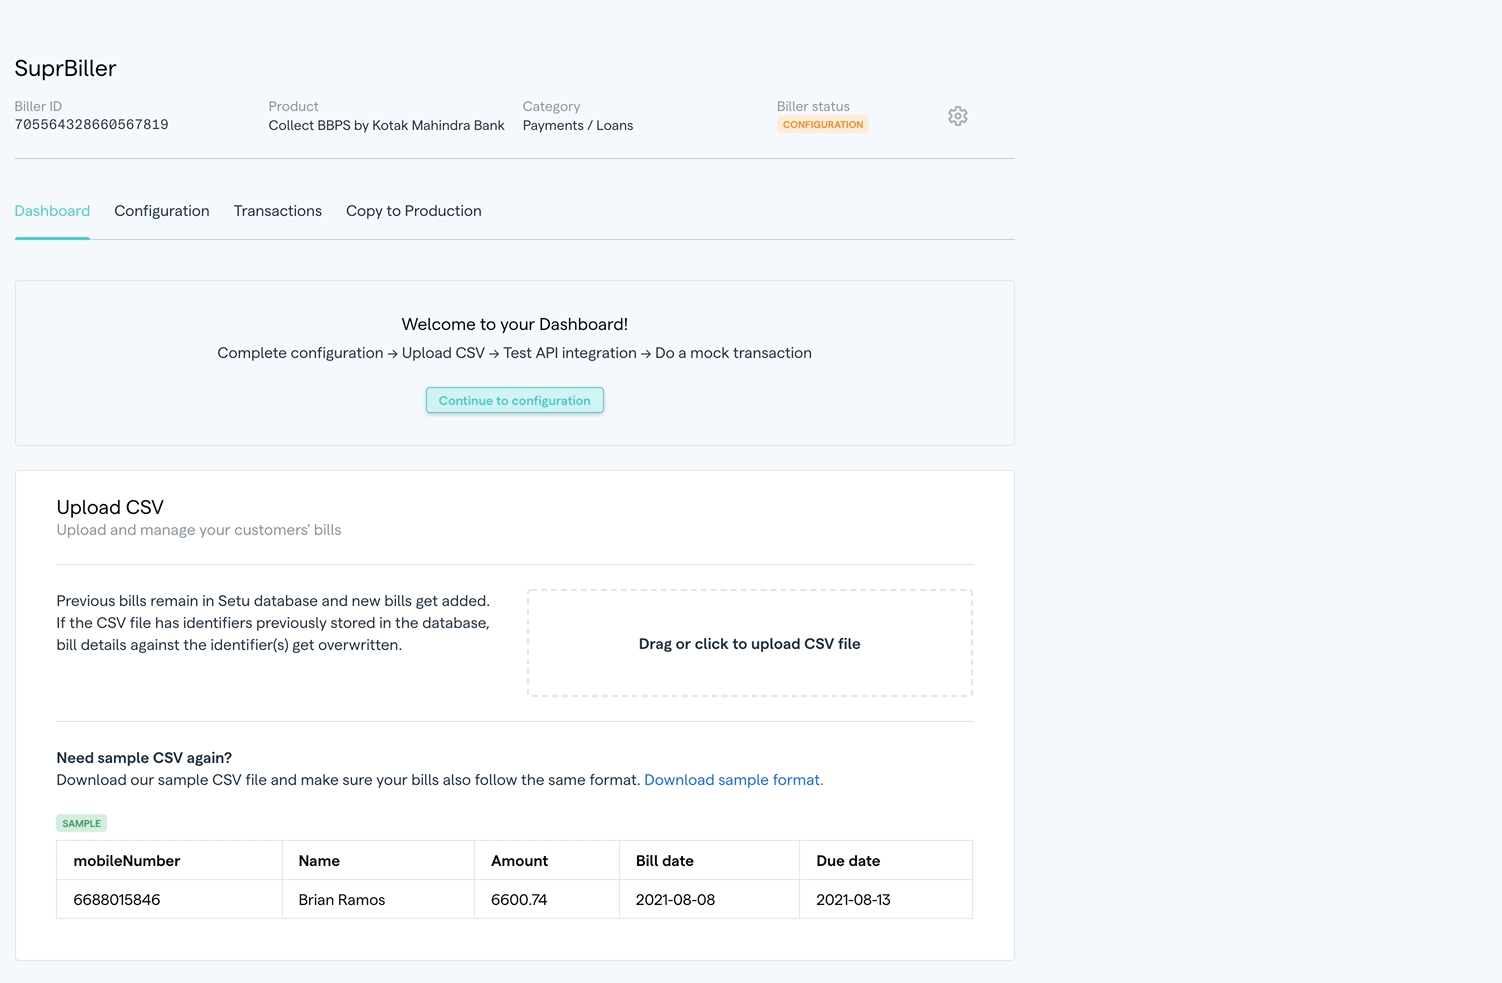
After the biller creation step, we should be on the biller profile. Here, you will see four tabs—Dashboard, which is an overview page, Configuration has all the integration details for this biller, Transactions where you can see test payments made to this biller, and Copy to Production, to copy the same config to Production later.
Click the Configuration tab from the biller profile. Add biller details and the bill details before proceeding to the integration setup. The customer identifiers you enter will determine the CSV format.
Attribute name is the variable or parameter name that your system recognises as the identifier to uniquely identify a customer. Make sure this name matches with the column name, which has the customer identifier data in your CSV.
Attribute displayed as is what the user would see in the payment app such as PhonePe or GPay.
Length denotes the minimum and maximum number of characters the customer can enter for the identifier.
Regex / pattern helps to check if the identifier entered by the customer is valid or not.
You can define up to 4 customer idenitifers.
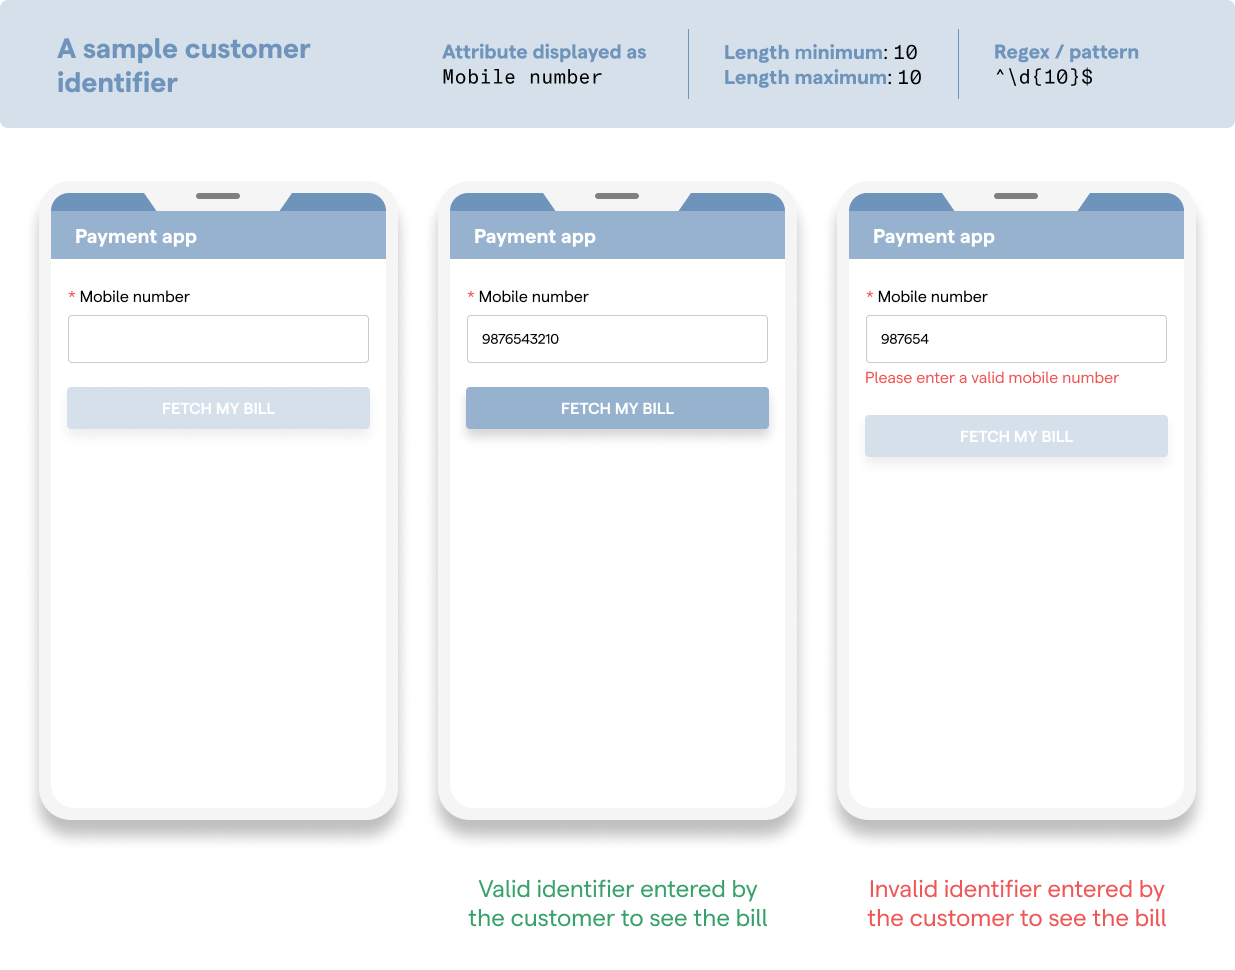
You can test customer identifiers that you configure, on Bridge. A sample app is available at the bottom-right of the screen on your configuration page, to test the integration.
#Step 3 — Prepare CSV file for bills
Now scroll down to the integration setup section. Here, you should see a sample CSV generated based on the customer identifiers you entered in the Bill details section. You may also edit the column names, should you wish to do so.
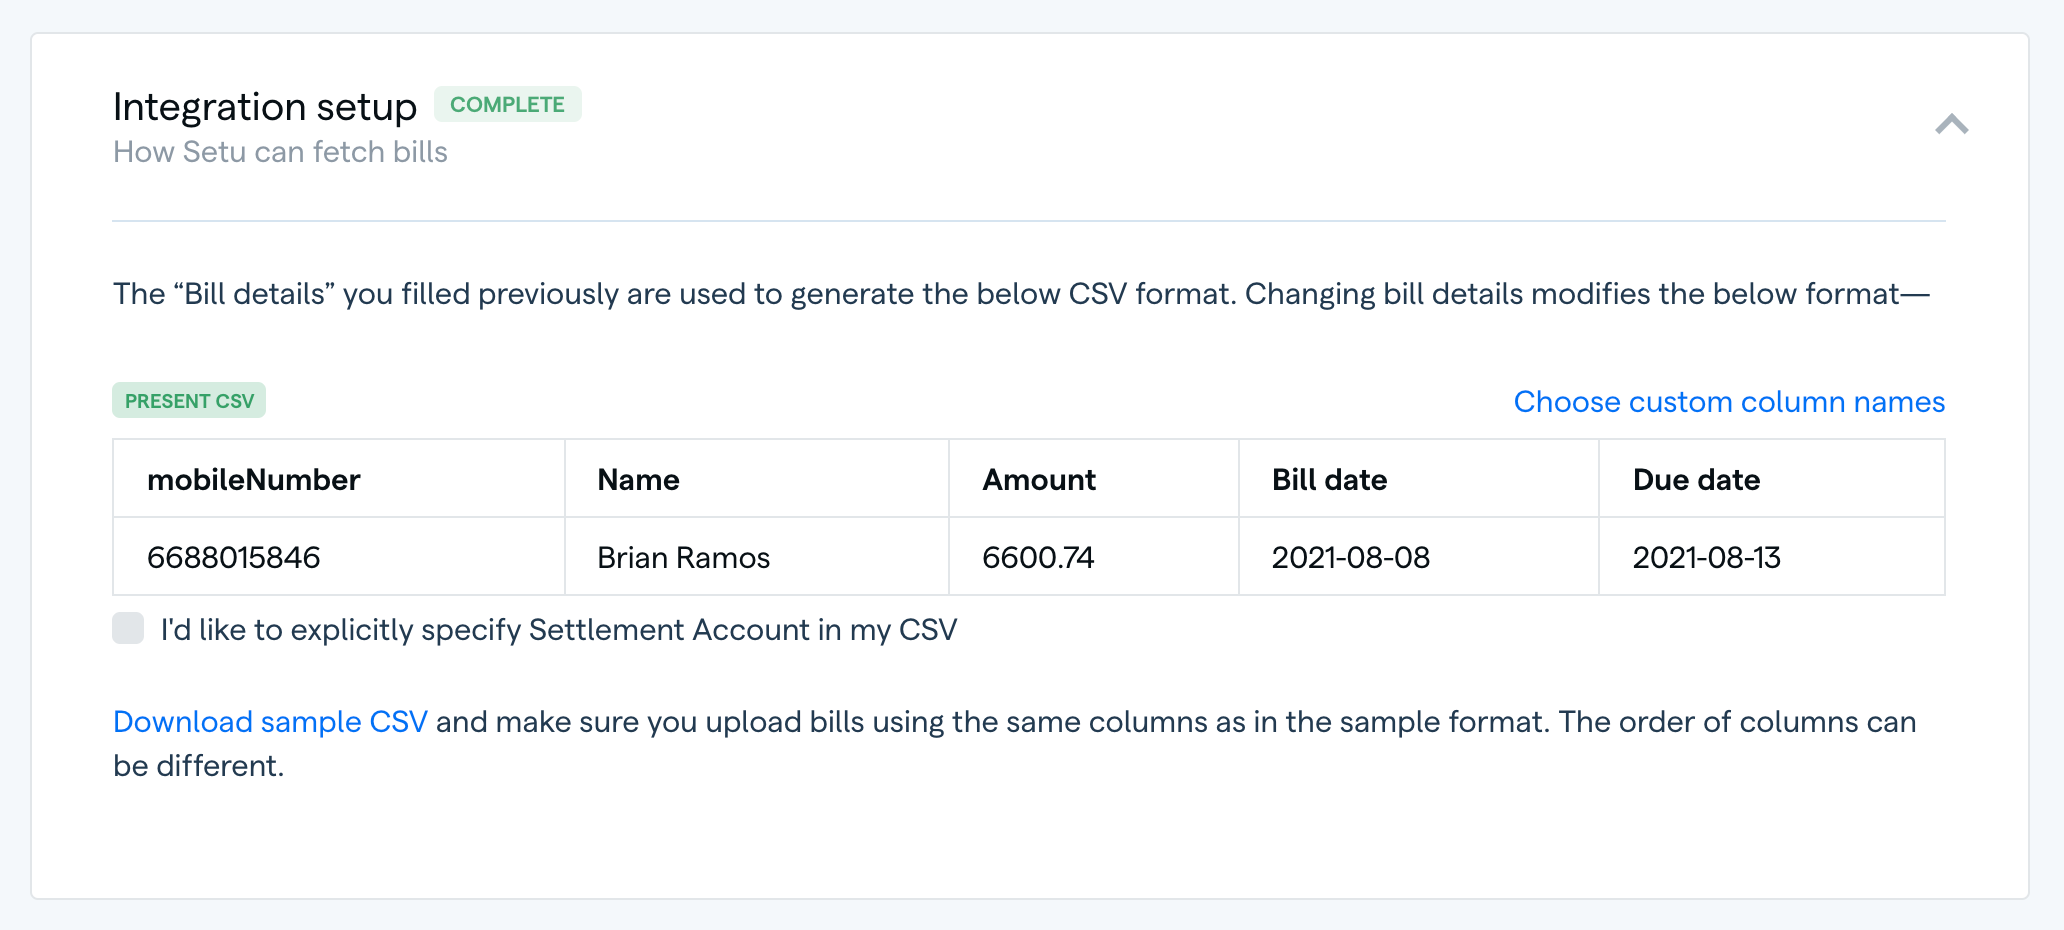
Once you’ve finalised the column names of the CSV, download a sample and add in all your customer bills to the file.
Verify that the column names in your CSV file the latest sample format on the UI to avoid any errors.
#Step 4 — Upload bills in CSV file
Head to the Dashboard tab. In the Upload CSV section, drag and drop the CSV file that has your customer bills.
Upload progress will be shown on the right side panel. On the panel, you will also see a log of all the previously uploaded CSV files, the latest will be top-most.
Large CSV files may take some time to get parsed and be shown on the UI.
Once the CSV upload is successful, you should be able to see the number of bills uploaded and saved in the system.
#Upload another CSV file with bills
You can add new bills to the system in the same way as described above. When you upload a CSV file, bills with new customer identifiers will be appended to existing bill data.
Bills with the same customer identifiers as previously uploaded bills will get overwritten with the latest bill amount. If bill amount is “0”, it will be considered to be a paid bill and no outstanding dues will be shown to your customer.
When your customers make payments against bills, transaction and payment status is made available to you in the reports section.
Was this page helpful?