
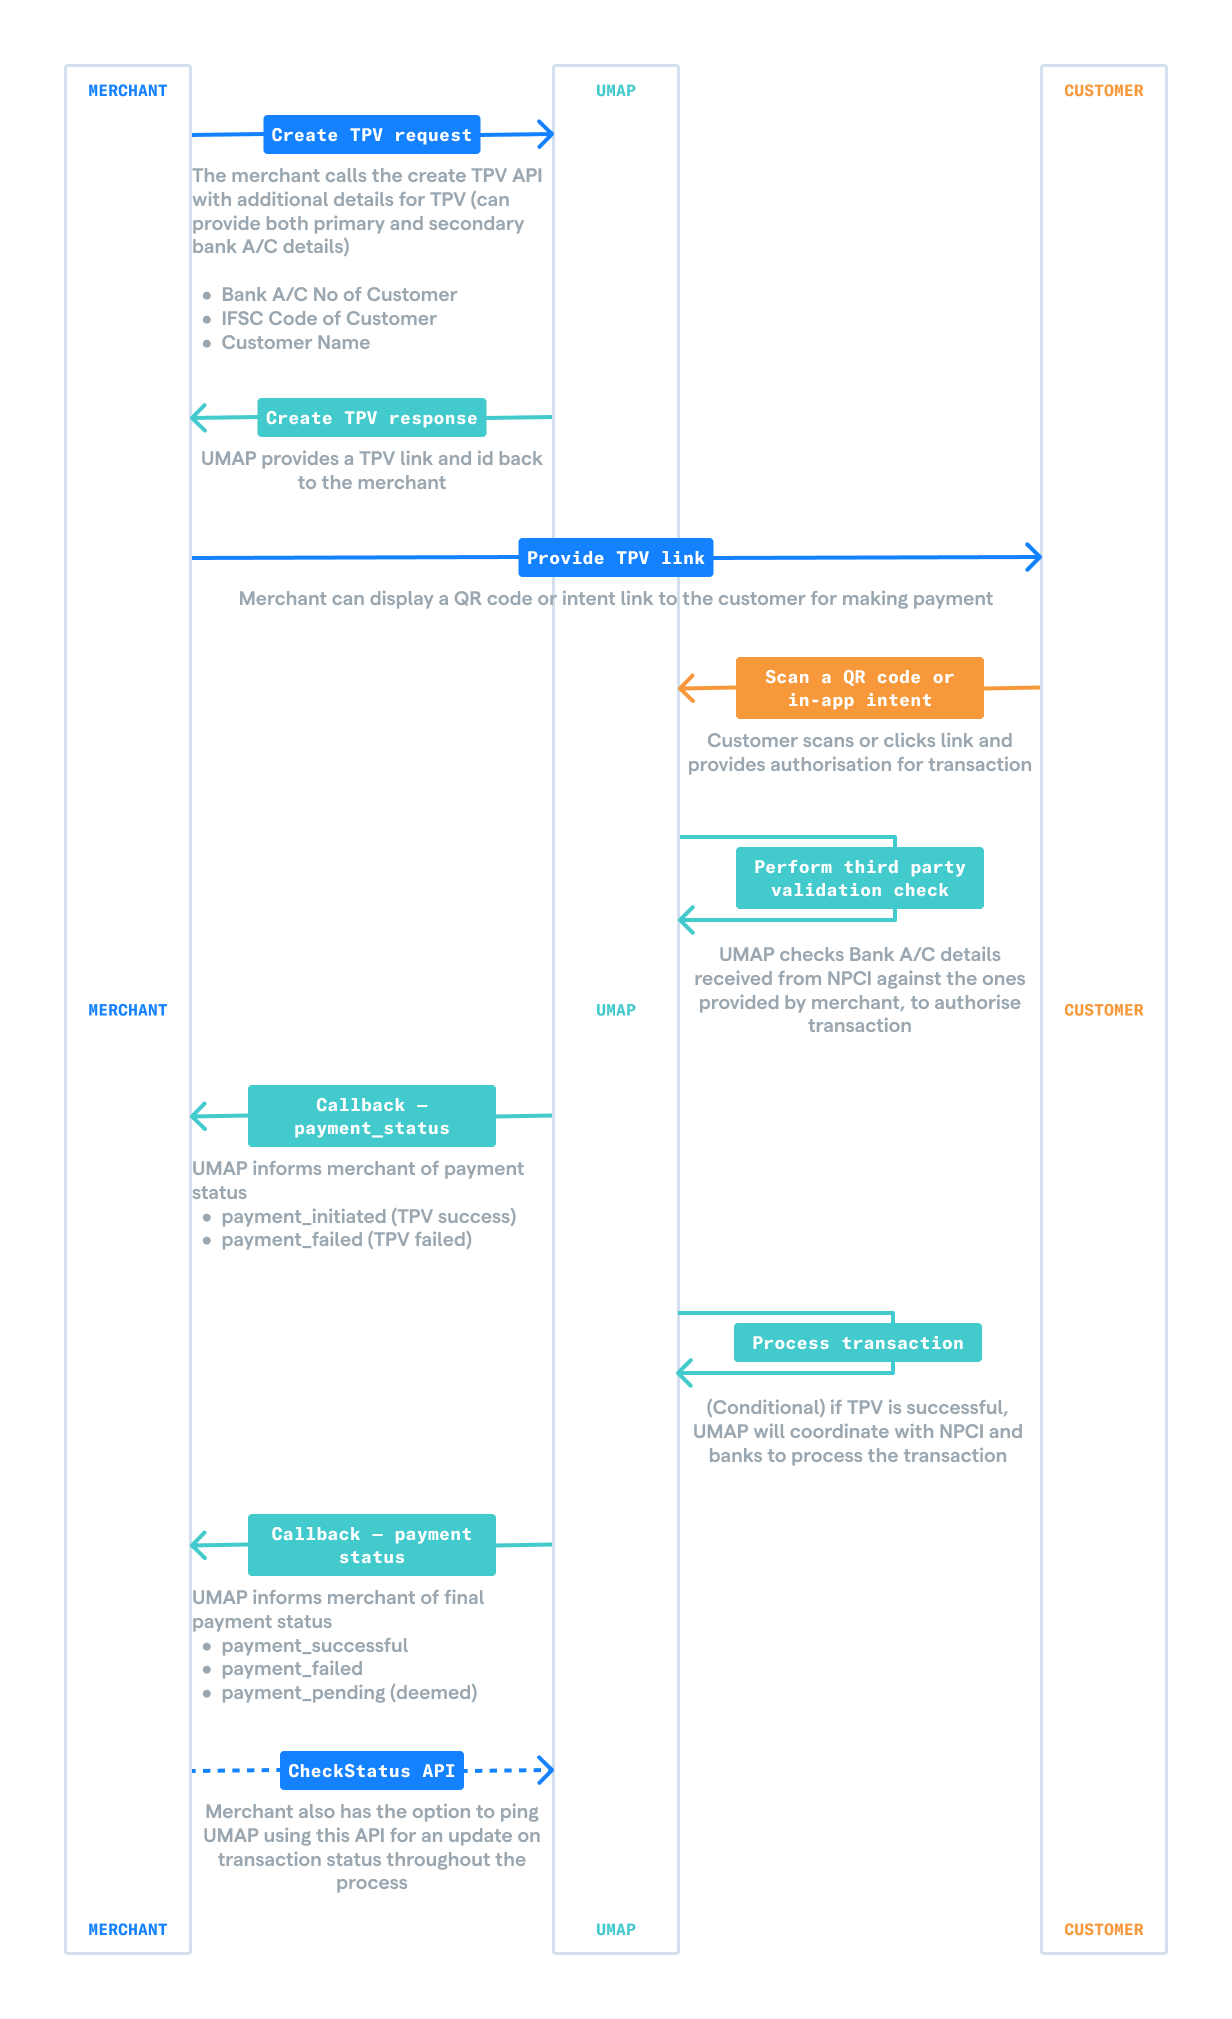
#Third party validation
The Third Party Validation (TPV) QR introduces an enhanced layer of security to the traditional UPI QR by incorporating a conditional validation check of the customer’s bank account details. This procedure is designed to ensure that payments are made from a bank account that has been previously registered with the merchant, typically during the on-boarding or KYC process.
The TPV process is a mandatory check required for most capital markets merchants and is mandated by SEBI to ensure that funds are collected from a verified account of the customer only. It can also be beneficial for other use-cases like insurance, loans and loyalty programs.
#Step 1 - Create payment link with validation
When creating a payment link, merchants have the option to include the customer's bank account details as part of the link creation request. This additional information is aimed at facilitating the validation process.
Create request ↗#Step 2 - Validate account during transaction
As the transaction is initiated and processed through the UPI system, the bank account details provided at the payment stage are compared against those supplied by the merchant. This comparison is conducted in real-time, with the UPI Setu system receiving the customer's bank account details from NPCI.
#Step 3 - Accept or reject transaction
Based on the outcome of the validation check, the UPI Setu system decides whether to accept or reject the transaction. If the customer’s bank account details match the details registered with the merchant, the transaction proceeds. If there is a discrepancy, the transaction is halted to prevent unauthorized payments.
#TPV Process Flow
#Step 1 - Create QR with validation
When creating a QR, merchants have the option to include the customer's bank account details as part of the request payload. This additional information is aimed at facilitating the validation process.
Create TPV QR ↗Sample bank account validation object—
{"primaryAccount": {"IFSC": "SBIN0000001","accountName": "ram","accountNumber": "189038291312"},"secondaryAccounts": [{"IFSC": "ICIC0000001","accountName": "shyam","accountNumber": "98412490124"}]}
#Step 2 - Accept or reject a payment
When a customer interacts with a QR or a payment shortlink and tries to make a payment, the bank account details provided at the payment stage is compared real-time with those supplied by the merchant.
Fetch QR status ↗A payment is accepted and the customer's bank account is debited, only if the details match.
Sample reason object, when a payment is rejected—
{"reason": {"code": "payment-failed","desc": "account name: mismatch","npciErrCode": "YG","npciErrDesc": "MERCHANT ERROR (PAYEE PSP)","npciErrCategory": "BD"}}
#Step 3 - Retrieve payment details
There are two methods in which the merchant can get the details of the payment made by the customer
- Get notified on payment events with merchant notifications
- Fetch payment history for the QR
Check payment status ↗
Was this page helpful?