
#Overview
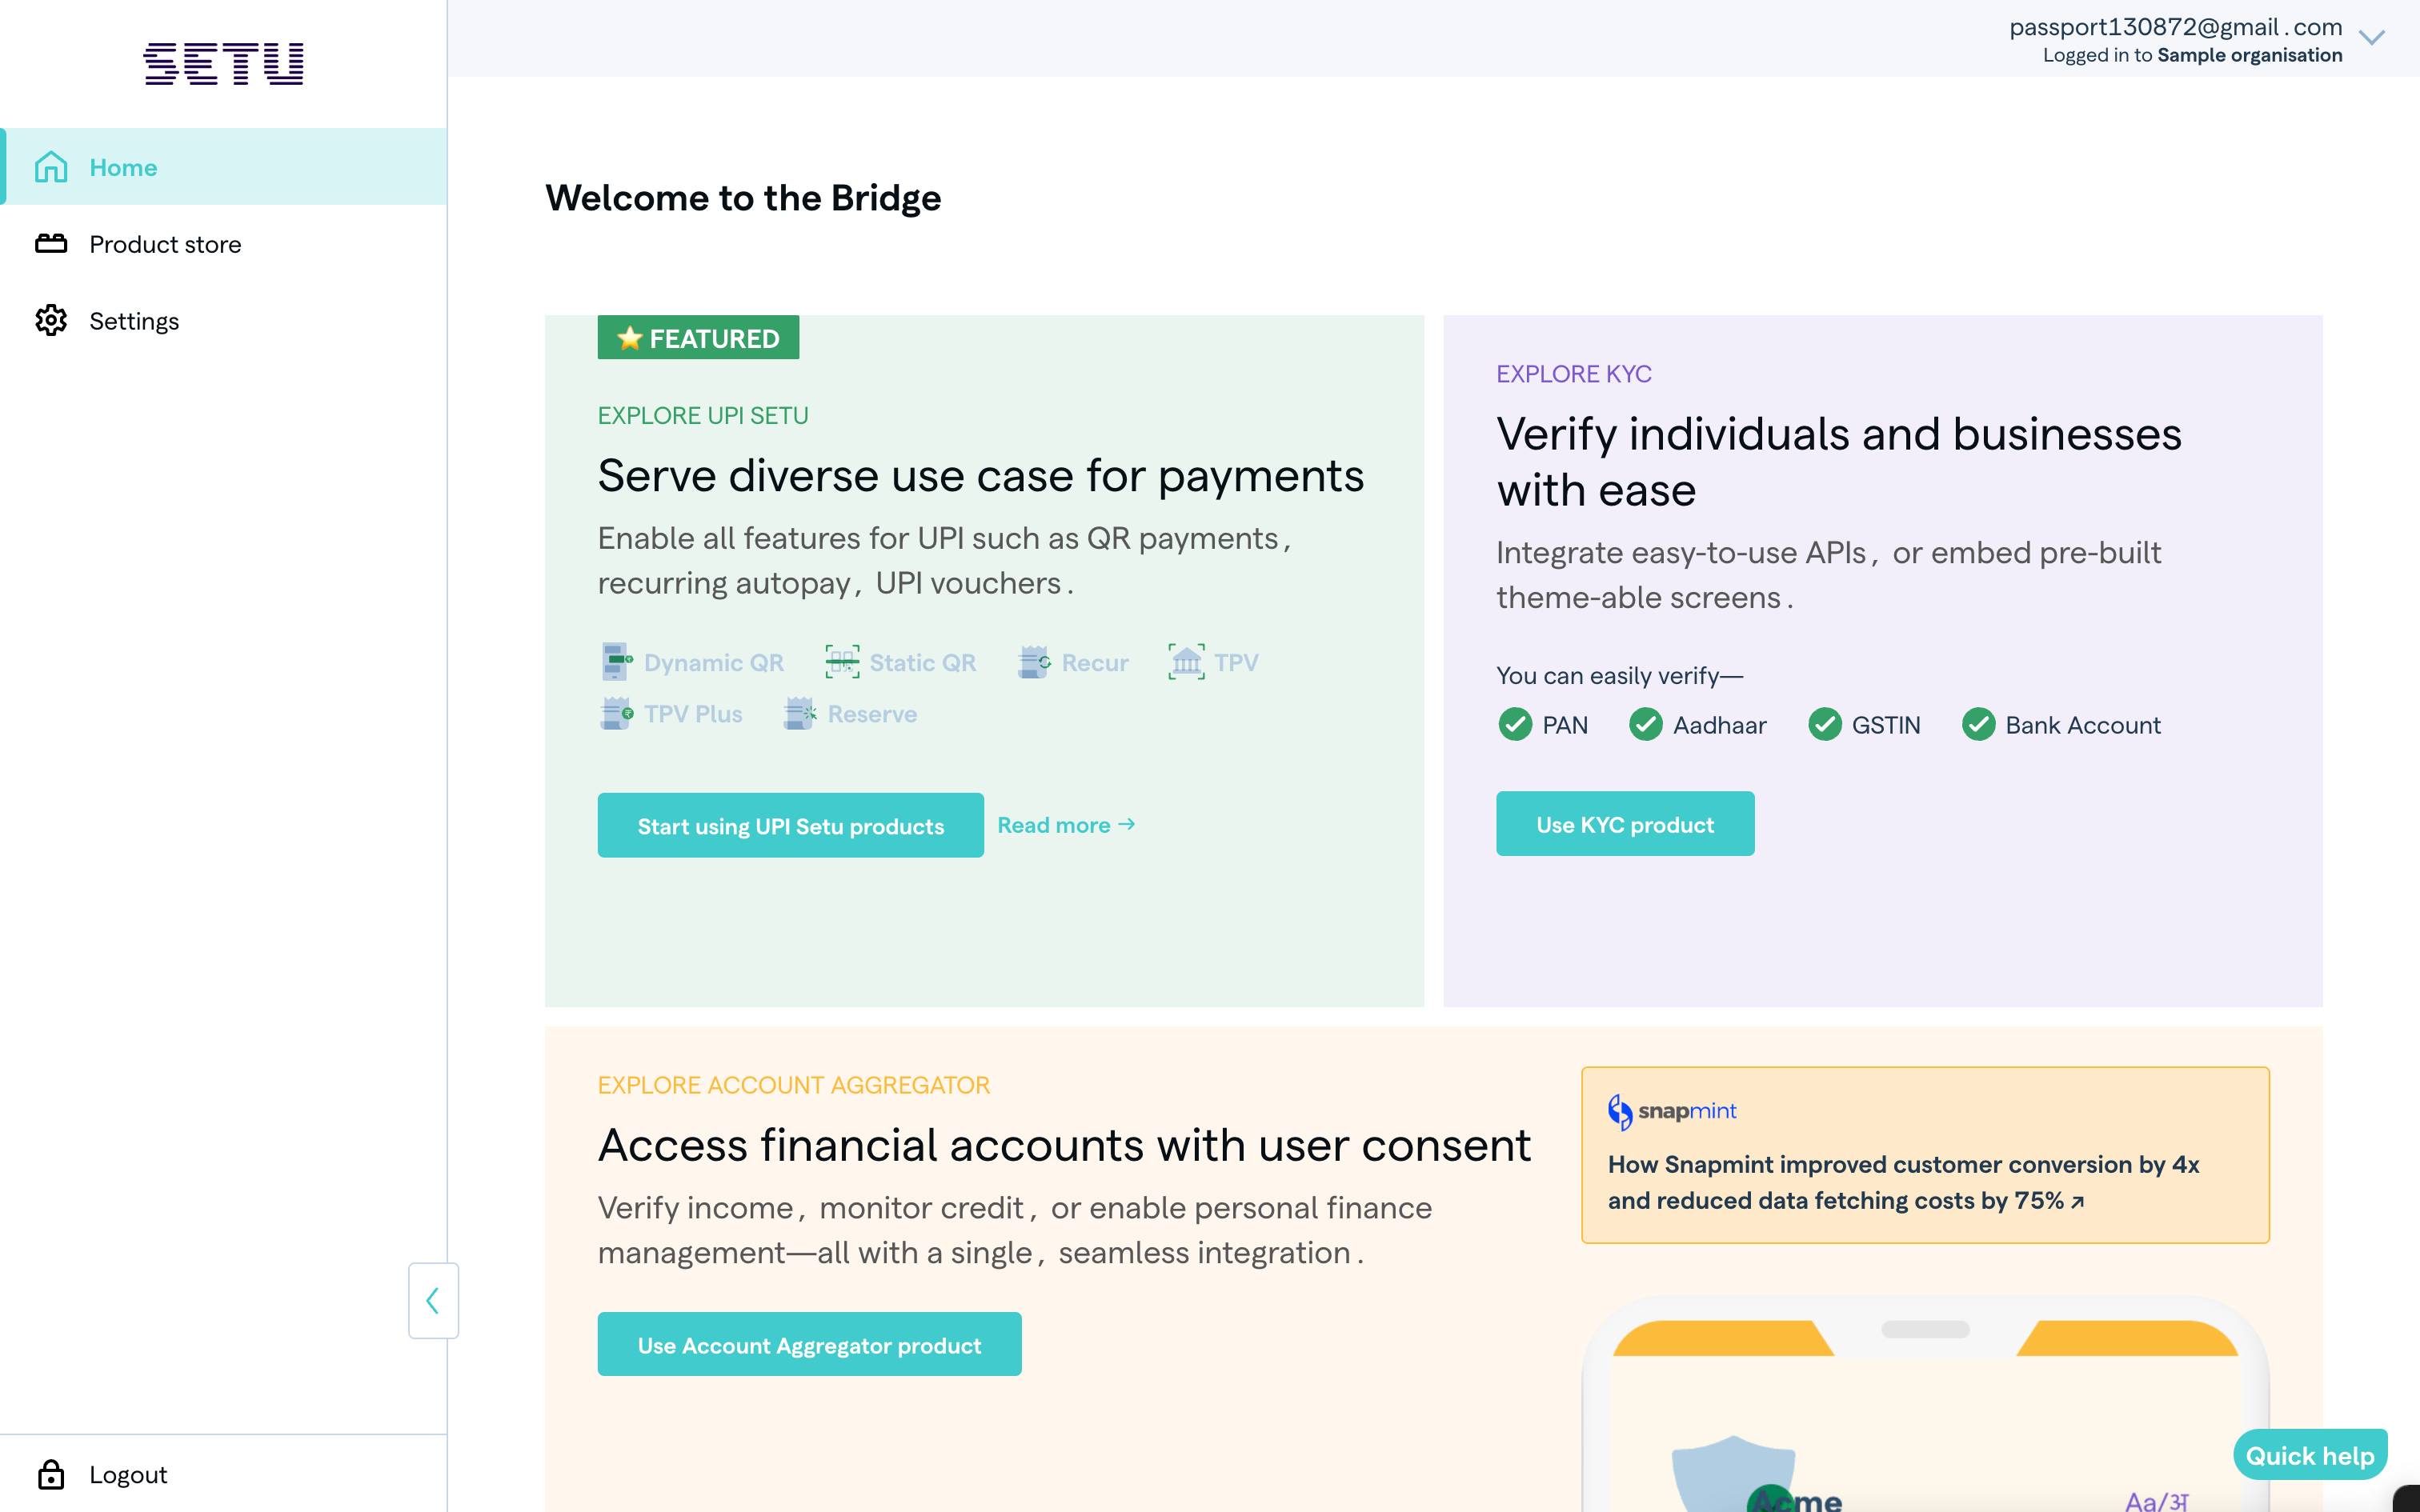
Bridge is a free self-serve platform provided by Setu, where you can explore and use multiple products provided by Setu—fill in details to go live with products, manage user access to those products, and also check reports and analytics related to your configured products, on a single platform.
Explore the platform and get started with Setu Bridge
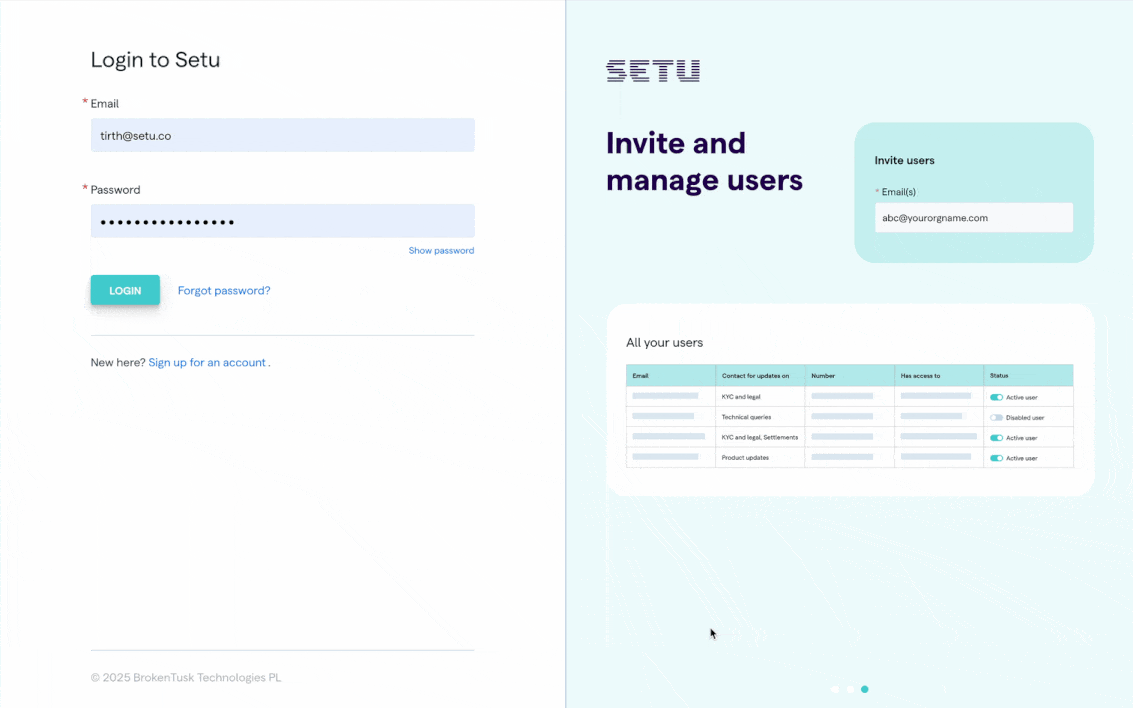
#Sign up on the Bridge
You can sign up on the Bridge in a few simple steps:
- Provide your e-mail ID. Ensure that you use an official e-mail where you want access to different API products.
- Enter or create your password for Bridge. Make sure you fulfil all the criteria mentioned on the platform; otherwise, you cannot proceed.
- Go to your inbox and confirm your e-mail ID. We send you an e-mail to verify your ID.
- Log in to the Bridge account you created. Use the same e-mail ID and password again to log in to your account, and complete the sign up process.
- Provide your business name. This should belong to the business you’re setting up the Bridge account for. **Quick note:** You can use a different business name later when you configure the product (say, if you have a subsidiary or a different legal name).
- Optionally, set up 2FA (two-factor authentication) for account login. Enable or disable 2FA, which asks for a password and an OTP sent to your registered e-mail ID whenever you login.

#Log in to Bridge
You can log in to the Bridge in a few simple steps:
- Enter your registered e-mail ID.
- Enter your password.
- Enter OTP. Note, you need to provide an OTP only if you have enabled 2FA.
#Navigating Bridge
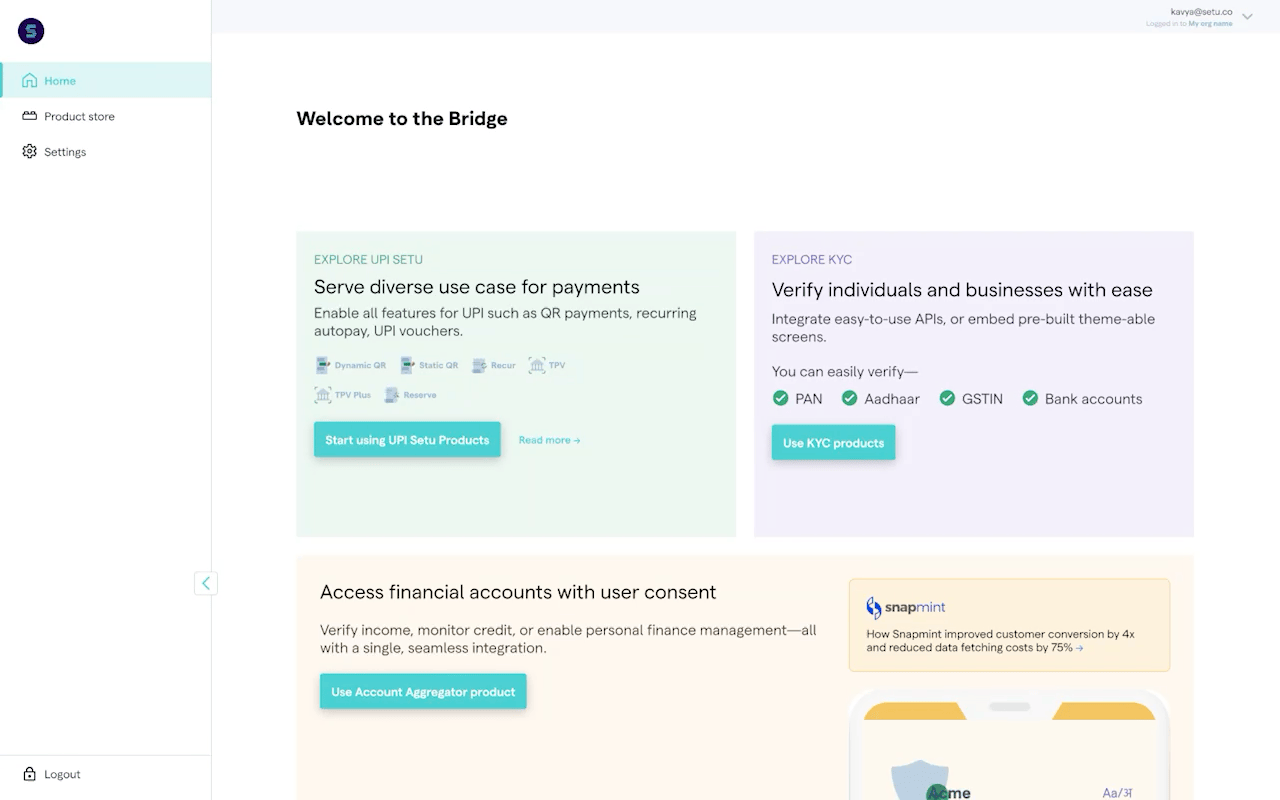
Side navigation items
Explore the different sections on the Bridge sidebar.
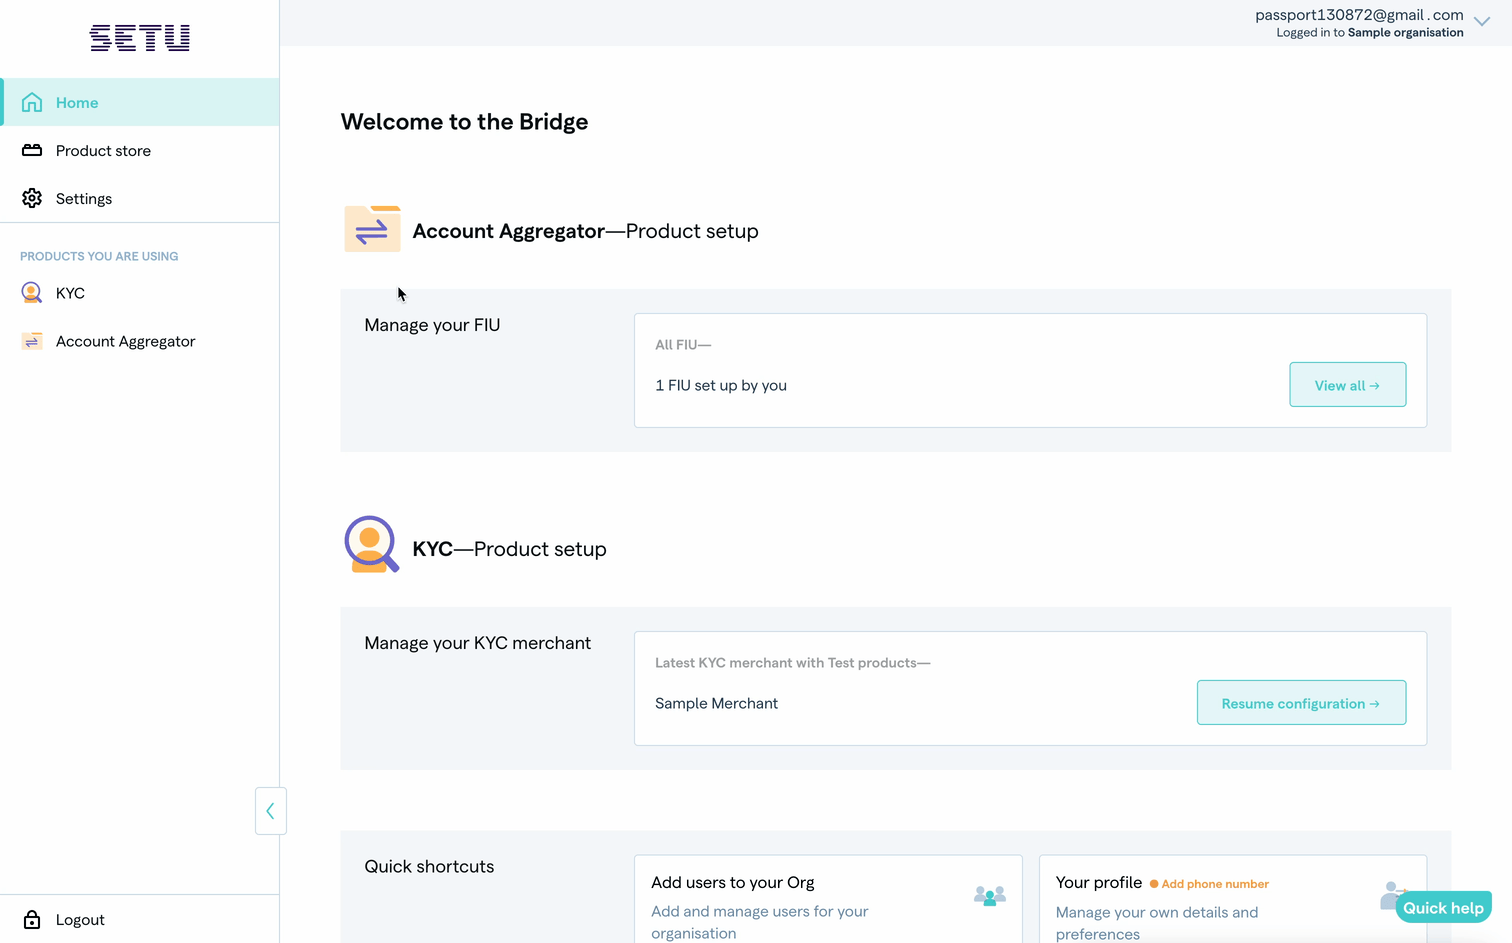
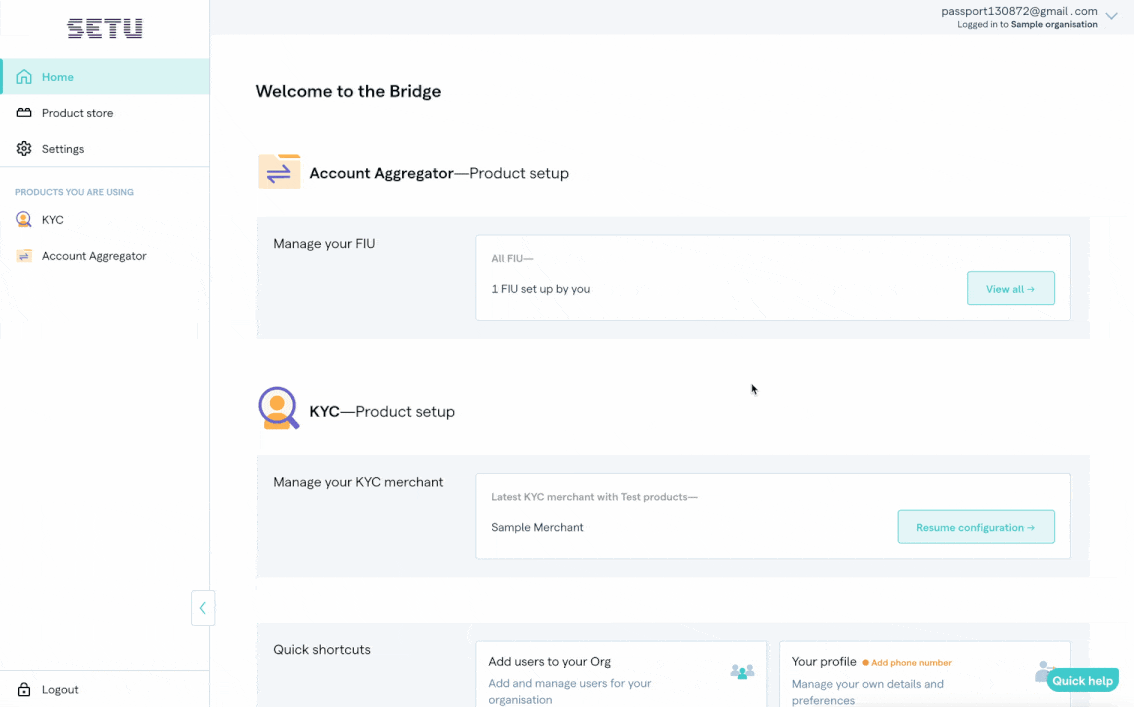
The Home page is a central view for all products. This is where you can see details of your child accounts, pending integrations, and data on live integrations.
The Product store contains a list of all Setu product categories.
Settings provide controls for your organisation, including:
- A list of users, whom you or other administrators can invite or disable, for either the parent Bridge account or specific child accounts.
- Setting option to set up 2FA for all users invited to your Bridge account.
- Common API credentials that you can use for integrations across all child accounts.
The “PRODUCTS YOU ARE USNG” section shows the list of product categories you are using. Clicking any of them takes you to the context of that category, where you can:
- View product-specific reports and analytics.
- Navigate to product instances.
- See child accounts for the product category, if you manage more than one.
Your Profile
Was this page helpful?